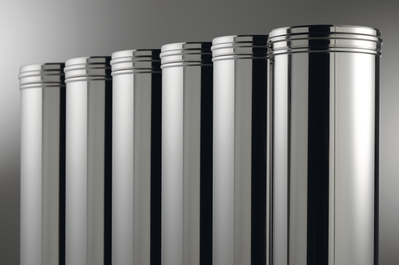
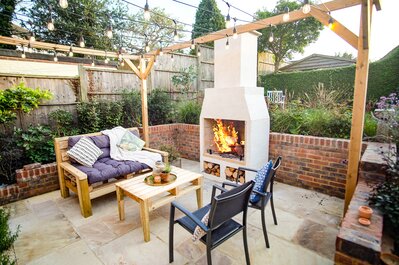
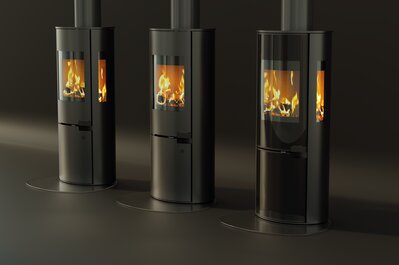
Schiedel SWIFT AIR
Provides an alternative to underground ducting
Schiedel Swift Air provides all the benefits of the Schiedel Swift but in addition, neatly and simply delivers combustion air to the heating appliance. Ideally suited to energy efficient buildings, the Schiedel Air System provides an alternative to underground ducting, eliminating the risk of ‘wind’ effect’ influences on the draft of the chimney.
Schiedel recently completed a project to install the Swift Air system within new-build housing at Pipers Hill, a development by the Ballymore Group in County Kildare. Each home features a wood burning stove alongside energy efficient water boilers and solar panelling, which allows the homeowner to have flexibility in choosing their energy source. Click here to see more information.
Service and pre-sales support
If you have any projects which require drawings or need an assessment of your existing project drawings, then get in touch with us. We can specify the list of components required and also advise on safety aspects, as well as the various different options you have – click here to contact us now.
Features
- The combination of advanced chimney technology and modern efficient wood burning appliances can give you the best of both worlds – an energy efficient home and the enjoyment of a real fire.
- The Swift Air System delivers combustion air directly to the appliance from outside the house, eliminating drafts in the living room thus further improving energy efficiency.
- No warm air is taken from the room where the appliance is positioned.
- Suitable for stoves, stove inserts, cookers and boilers.
- Suitable for all fuels – gas, oil, solid fuels and biomass fuels.
- Suitable for Timber Frame, Steel Frame and Masonry construction.
- Air-independent chimneys reduce the wind effect on the air intake.
- Provisions for additional air intake channels / ducting are no longer necessary.
Technical Specification
Designation Code: | A1 N1 T400 G40 |
Operation: | Negative Pressure |
Fuel: | Oil, Gas, Solid Fuels, Biomass Fuels |
Exhaust Temperature: | 400°C |
Inner Liner: | High Grade Ceramic |
Outer Wall: | Lightweight Block |
Insulation: | Mineral wool (90kg/M3) |
Test Pressure: | 40 Pa (2m3. s-1. m-2 x 10⁻³) |
Thermal Resistance: | R65 m2K/W |
Liner Cement: | Rapid HT Cement |
Mortar for Chimney Blocks: | Supplied by installer. Must be minimum compression class M2.5. |
Installation Guidelines
The construction and application of chimneys and flues is covered by Building Regulations in conjunction with the relevant European Standards. Whilst these differ in emphasis, they all mandate the safe application of the chimney no matter where and how used. These Regulations and Standards dictate the minimum criteria which it is necessary to apply if the chimney or flue is to function safely and correctly.
Building control approval is necessary for building new chimneys and in some cases for relining old chimneys particularly if some alteration or change of the heating appliance occurs. The appropriate Regulations and Standards are listed below.
England & Wales:
Building Regulations Approved Document J
Scotland:
Building Regulations Technical Standards
Northern Ireland:
Building Regulations Technical Booklet L
Republic of Ireland:
Building Regulations Technical Guidance Document J
It is important to match the internal diameter of the flue with the outlet on the appliance. It should never be less than the outlet diameter of the appliance. The appliance manufacturer’s chimney sizing recommendations should always be followed.
For open fires with a standard fire opening up to 500mm wide by 550mm high the minimum required flue diameter is 200mm round or 175mm square. For larger open fires, such as inglenooks, dog grate installations or special appliances and stoves designed to operate with a fire opening greater than 500mm x 550mm, the flue size should be at least 15% of the free unobstructed area of the fire opening (including sides if open). Many Decorative Fuel Effect gas fires (DFE’s) that imitate a coal or log burning open fire require the same chimney arrangement as for solid fuel open fires and must be installed in accordance with respective local building regulations
Construction begins by providing a suitable foundation and constructional hearth in accordance with Building Regulations and site requirements.
The Schiedel Air System is a specially designed balanced flue that connects a Room Sealed Appliance to fresh air and enables combustion gases to escape safely. Therefore, in the majority of installations there is no need for air vents to be provided for the appliance.
- The recess height and width are open to personal choice depending on the size of the heating appliance. The components provided allows for an opening of H1200mm x W900mm. If a wider opening is required you will need to source a longer lintel which must be certified to span the width of the recess and support 2,100kg. An additional lintel may be added to make the recess deeper as required.
- Lay a damp proof course. Place the air block on a mortar bed and start to build the recess. The air block is 140mm deep, either use a block this deep or build a standard block flush with the front of the air block and leave a gap to the rear.Mark the centre of air cavity on the front of the air block and place in centre of recess. The air block can be built tight against the wall. If timber frame construction, attach the plasterboard before constructing the recess and the chimney
- Build up the Air Block, (HP3), in line with standard block, alternating on each row to ensure the block will ‘tie in’ and form a staggered joint. Ensure the joints are completely sealed and the air cavity is kept clear of access mortar.Once the desired height is reached add the lintel to the front of the recess. If necessary cut the top air block to sit level with top of the lintel. Complete the top course to the same height.
- Lay a bed of mortar on lintel and air block. Place starter block on top of lintel and back wall, align the rectangular hole to the back so it matches with hole in the air block. Ensure that the joint between the air block and the support block is sealed with mortar. Run a bead of high temperature cement around the flue aperture on the support block. Place the first chimney block on the support block. Wipe away any excess and mortar, particularly in the air chamber as you do not want to restrict the flow of air.
Mortar used in the installation of chimney blocks must have a minimum compression strength of M2.5.
There is no bend kit available for the Schiedel Air System however, an offset can be obtained by using the HP5 block within the stove recess. Each HP5 block has an offset of 120mm.
With a Free Standing stove, the chimney will not be positioned above the appliance. It is then necessary to provide a cleaning access and debris removal area. If it is a condensing appliance, a base stone can be used to collect the condensate. Provision should be made for the proper disposal of condensate.
- Core drill a suitable diameter hole in accordance with the appliance manufacturer’s instructions.
- Cut out a section of wall between the air gap and the flue section in the first block no smaller than the crosssectional area of the air channel. This allows the air intake to be placed at front or side of the block.
- Ensure the exhaust outlet of the appliance is aligned with the junction pipe of the chimney.
- Lay a damp proof course. Lay a bed of mortar and place the chimney block with the removed section into desired position. Add the required number of additional chimney blocks (refer to table on page 25) depending on how high the connecting tee needs to be to suit your appliance.Place the universal starter block on a bed of mortar on top of this chimney block. Line up the air gap in the block with the air gap in the support block.
- Apply a bed of mortar to the top of the universal starter block and place another chimney block.
- Fill in the bottom half of the chimney shaft with mortar so as to allow for the inspection pipe to sit into. This will mean only having to cut one chimney block to accomodate the inspection pipe.
For condensing appliances you will need to use a base stone in place of the mortar to allow for the condensate to be drained off and disposed of.
- Place the next cut chimney block on a bed of mortar. (A cardboard cutting template is supplied on the front of the inspection door)It is essential that a mortar bed is laid between the air gap and flue aperture. bend the insulation around the inside of the chimney block. Once fitted, cut the insulation along the ventilation channel.
- Put a bead of high temperature cement around the bottom rebate of the inspection pipe, place it in the chimney block (socket uppermost).
- Place a standard chimney block on a bed of mortar. Bend and insert insulation. Next place the final cut block on a bed of mortar. (A cardboard cutting template is supplied on the front of the inspection door)
- Bend and place the insulation around the inside of the cut block and cut along the ventilation channel. Apply high temperature cement to the socket end of junction pipe and place into block.
- Add a standard block on a bed of mortar. Fit insulation around the junction pipe.
- Bend the two pieces of insulation into the block. It is important the insulation is fitted as inset illustration to avoid the insulation going into the moulded recess within the chimney block.Place the flue liner into the chimney block, with the female rebate facing upwards. Arrows on each flue liner indicate the directional flow of flue gases. Continue to apply high temperature cement to each flue liner, cleaning any access material from the joints.
- The chimney blocks should be tied every metre to a structural wall with the supplied masonry/steel frame ties. Standard timber frame ties should be used in timber frame construction.
- Where the chimney passes through floor or ceiling joists, these need to be trimmed out leaving a gap of 40mm for timber and 30mm for concrete. This gap is then filled with non-combustible material.
- Continue to build the chimney as a single block to the stack. Special plastic connectors are inserted in all 4 corners of the chimney block to provide stability against wind loading. These should be used from a point 1 metre below the last point of lateral support.
Reinforcement bars should be used instead of the plastic connectors for chimney stacks over 1.2m high.
- Place the coping on a bed of mortar on top of the DPC coping tray.
- Place the chimney pot on the coping ensuring the space between the pot and coping is sealed with mortar or other non-porous material
- Finally apply an exterior waterproof render.
- A corbel is required for brick or block cladding. This give a stack of 790mm x 680mm (3 bricks by 3.5 bricks).
- Continue to build the chimney block on the corbel. Keep the cavity between the block and outer skin clear of mortar. A chimney tray is recommended for brick clad stacks. Fit the chimney tray over the chimney block and let it rest on the bricks as shown with the apron on the slope side. Wall weeps should be put into the brick joints to ventilate and remove any trapped moisture. Chimney Trays are an additional option and can be produced to specific requirements.
- Before placing the coping tray into position, ensure the chimney block and the outer skin are at the same level at the top of the stack. Place the coping tray into position on a bed of mortar and ensure the gap between chimney block and outer skin is sealed properly.
- Place the coping on a bed of mortar on top of the DPC coping tray.
- Place the chimney pot on the coping ensuring the space between the pot and coping is sealed with mortar or other non-porous material. Also inside the chimney pot seal the space between the pot and expansion plate with mortar or other non-porous material.
Reinforcement bars should be used instead of the plastic connectors for chimney stacks over 1.2m high. The bars must start 1m below the last point of lateral support.
- Start by inserting the plastic stoppers into the holes on the block before the first one with bars.
- Screw the bars together and inset equal lengths into the 4 holes. The liquid grouting mortar should be poured into the reinforcing channels. Keep the reinforcing bars centred.
After installation is complete tests and checks should be carried out in accordance with document J of the Building Regulations. A chimney notice plate must be completed and permanently fixed in the dwelling, ideally near the electrical consumer unit. The checklist and notice plate are available from Schiedel.
The chimney should be left for at least 72 hours before use, then start only with small fires for the first week and gently increase thereafter.
The chimney should be swept at least twice a year, once before the heating season and once after the heating season. You may need to sweep during the heating season depending upon use. The brush should be a medium density polypropylene bristle type and should be the same diameter as the flue. Steel brushes must not be used to sweep the flues.
Always follow the appliance manufacturer’s operating instructions. Always burn approved fuels or dry seasoned wood. Avoid burning unseasoned wood and slow burning of solid fuels as this can produce excessive soot and condensation which in turn cause soot fires and damage. If correctly installed, operated and maintained these systems should last the life of the dwelling.
Applications
In an A rated house the combustion air required for wood burning appliance like a stove burning logs or wood pellets must be supplied directly to the stove from outside the house.These appliances are called room sealed as they are manufactured not to take air from the room.The Schiedel Swift Air provides all the benefits of the Schiedel Swift and in addition neatly and simply delivers the external air to the stove.
The alternative to Schiedel Swift Air is low level or under floor ducting ideally with air supplies from opposite sides of the house.
The Schiedel Swift Air solution avoids this by ducting the air through an external air shaft in the chimney.
Available in 150mm, 180mm and 200mm internal flue diameters. The size of the chimney block is the same for each flue diameter – 500mm x 360mm x 330mm high.
The heated air circulates within the house. The stove and the boiler do not take air from inside the house so no warm air is lost through the chimneys.
– Schiedel, enabling energy efficiency.
Components & Systems
Old Code | SAP Code | Description | Weight (kg) |
– | COA | 360 x 500 x 325mm high 160mm Ø | 33 |
– | COA | 360 x 500 x 325mm high 180mm Ø | 34 |
– | COA | 360 x 500 x 325mm high 200mm Ø | 34 |
All dimensions are external apart from the liner diameters, which are internal. |
Old Code | SAP Code | Description | Weight (kg) |
A101003650 | 100363 | 360 x 500 x 325mm high 160mm Ø | 27 |
A101003650 | 100363 | 360 x 500 x 325mm high 180mm Ø | 27 |
A101003650 | 100363 | 360 x 500 x 325mm high 200mm Ø | 27 |
All dimensions are external apart from the liner diameters, which are internal. |
Old Code | SAP Code | Description | Weight (kg) |
A03 | 100374 | 333mm high 160mm Ø | 6 |
A04 | 100375 | 333mm high 180mm Ø | 6 |
A05 | 100376 | 333mm high 200mm Ø | 7 |
All dimensions are external apart from the liner diameters, which are internal. |
Old Code | SAP Code | Description | Weight (kg) |
A160100015 | 133296 | 1 Per Chimney Block 160mm Ø | 0.5 |
A160100018 | 100379 | 2 Per Chimney Block 180mm Ø | 0.3 |
A000505008 | 100380 | 2 Per Chimney Block 200mm Ø | 0.3 |
All dimensions are external apart from the liner diameters, which are internal. |
Old Code | SAP Code | Description | Weight (kg) |
– | 100420 | 660mm high 160mm Ø | 13.3 |
– | 100421 | 660mm high 180mm Ø | 14.5 |
– | 100422 | 660mm high 200mm Ø | 15.4 |
All dimensions are external apart from the liner diameters, which are internal. |
Old Code | SAP Code | Description | Weight (kg) |
– | 100424 | 660mm high 160mm Ø | 15.9 |
– | 100425 | 660mm high 180mm Ø | 18.1 |
– | 100426 | 660mm high 200mm Ø | 19.1 |
All dimensions are external apart from the liner diameters, which are internal. |
Old Code | SAP Code | Description | Weight (kg) |
– | 100428 | 660mm high 160mm Ø | 13.6 |
– | 100429 | 660mm high 180mm Ø | 14.9 |
– | 100430 | 660mm high 200mm Ø | 16.7 |
All dimensions are external apart from the liner diameters, which are internal. |
Old Code | SAP Code | Description | Weight (kg) |
– | 100475 | 160mm | 10 |
– | 100475 | 180mm | 10 |
– | 100475 | 200mm | 10 |
All dimensions are external apart from the liner diameters, which are internal. |
Old Code | SAP Code | Description | Weight (kg) |
– | 102684 | 170mm high 160mm Ø | 12 |
– | 102685 | 170mm high 180mm Ø | 14 |
– | 102686 | 170mm high 200mm Ø | 16 |
All dimensions are external apart from the liner diameters, which are internal. |
Old Code | SAP Code | Description | Weight (kg) |
A1800035 | 131181 | 500 x 360 x 100mm high | 20 |
All dimensions are external apart from the liner diameters, which are internal. |
Old Code | SAP Code | Description | Weight (kg) |
A1800035 | 131182 | 500 x 360 x 100mm high 160mm Ø | 20 |
A1800036 | 130823 | 500 x 360 x 100mm high 180mm Ø | 20 |
– | COA | 500 x 360 x 100mm high 200mm Ø | 20 |
All dimensions are external apart from the liner diameters, which are internal. |
Old Code | SAP Code | Description | Weight (kg) |
A1700003 | 130770 | 1500 x 150 x 75mm high | 36 |
All dimensions are external apart from the liner diameters, which are internal. |
Old Code | SAP Code | Description | Weight (kg) |
A26000209 | 130701 | 900 x 790 x 70mm high Large | 96 |
A26000206 | 130702 | 650 x 500 x 70mm high Small | 28 |
All dimensions are external apart from the liner diameters, which are internal. |
Old Code | SAP Code | Description | Weight (kg) |
A26000203 | 131197 | 900 x 770 x 70mm high Large | 101 |
A26000204 | 130700 | 630 x 530 x 70mm high Small | 31 |
All dimensions are external apart from the liner diameters, which are internal. |
Old Code | SAP Code | Description | Weight (kg) |
A00061 | 130705 | 555 x 445mm 160mm Ø | 15 |
A00051 | 130671 | 556 x 445mm 180mm Ø | 15 |
A00062 | 130704 | 557 x 445mm 200mm Ø | 15 |
All dimensions are external apart from the liner diameters, which are internal. |
Old Code | SAP Code | Description | Weight (kg) |
A00053 | 130670 | 790 x 685mm 160mm Ø | 18 |
A00050 | 130672 | 791 x 685mm 180mm Ø | 18 |
– | COA | 792 x 685mm 200mm Ø | 18 |
All dimensions are external apart from the liner diameters, which are internal. |
Old Code | SAP Code | Description | Weight (kg) |
A25000206 | 131193 | 790 x 680 x 100mm high | 88 |
All dimensions are external apart from the liner diameters, which are internal. |
Old Code | SAP Code | Description | Weight (kg) |
A25000208 | 131195 | 640 x 680 x 100mm high | 88 |
All dimensions are external apart from the liner diameters, which are internal. |
Old Code | SAP Code | Description | Weight (kg) |
A1069001 | 130775 | 2 Per Metre | – |
All dimensions are external apart from the liner diameters, which are internal. |
Old Code | SAP Code | Description | Weight (kg) |
A1069000 | 130800 | 4 Per Block | – |
All dimensions are external apart from the liner diameters, which are internal. |
Old Code | SAP Code | Description | Weight (kg) |
A17500100 | 100020 | Rapid HT Cement (310ml) | – |
All dimensions are external apart from the liner diameters, which are internal. |
Old Code | SAP Code | Description | Weight (kg) |
– | 108972 | Universal Adaptor | – |
All dimensions are external apart from the liner diameters, which are internal. |
Old Code | SAP Code | Description | Weight (kg) |
– | 130745 | Air Pot | – |
All dimensions are external apart from the liner diameters, which are internal. |
Old Code | SAP Code | Description | Weight (kg) |
1 | 129041 | 300mm high Buff | 10 |
1 | 129042 | 300mm high Terracotta | 10 |
1 | 129040 | 300mm high Black | 10 |
All dimensions are external apart from the liner diameters, which are internal. |
Old Code | SAP Code | Description | Weight (kg) |
– | 137946 | 355 x 222 x 140mm | – |
All dimensions are external apart from the liner diameters, which are internal. |
Old Code | SAP Code | Description | Weight (kg) |
– | COA | 400 x 222 x 140mm | – |
All dimensions are external apart from the liner diameters, which are internal. |
Get in touch for more information
[wpanchor id=”contact”]